How to Upload Data?
Prepping the data
1: You will firstly want to open the Excel file which contains your data (I will be using demo data in this case).![]()
2: Then your excel file will load up and it will be full of data and should look something like the image below (Bear in mind depending on the data, you will have either have a little, or lots of data.)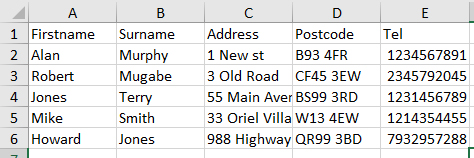
3: You will want to make sure that each column has the correct category name above it and there are no mistakes in the data.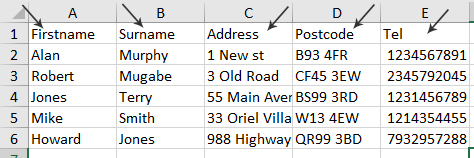
4: Also if there are any zeros in the data you will want to remove those and the quickest way to do those is to first highlight the whole Telephone column and then click format cells.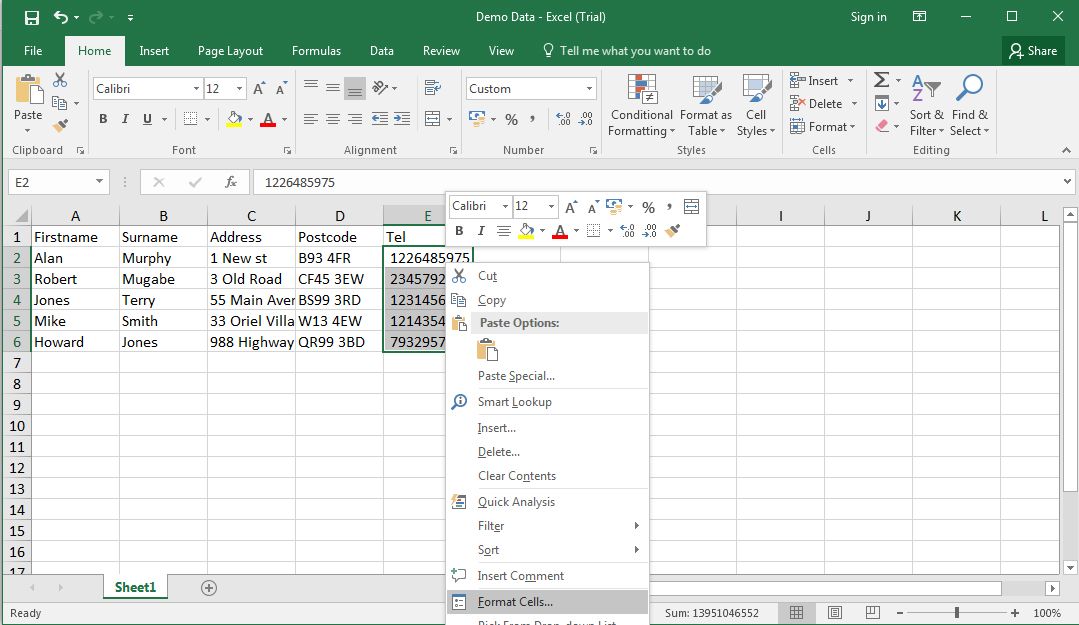
5: Then what you will want to do is go to custom, and then type in 10 zeros so what this will do is remove any other zeros that come before the 10 digits.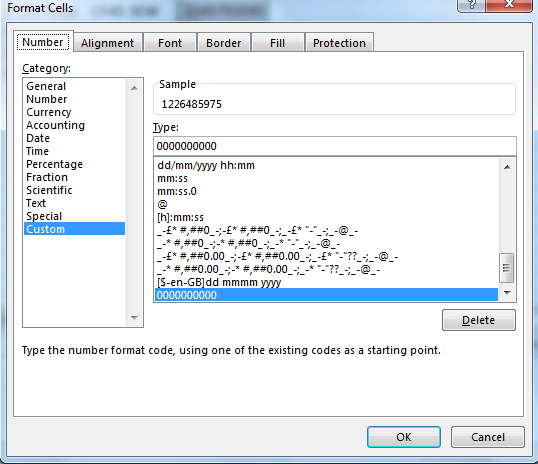
6: With removing 44’s the procedure is a little different and a little tricky. To begin with we will want to shift the column roughly 2 to 3 places to the right to create space for the formula we will be using.
7: As you can see there is a dot in the corner in the picture above where the arrow is pointing to, we hover over mouse over this dot to get a black plus sign and then we click & hold and drag it over 3 columns to get the bottom result.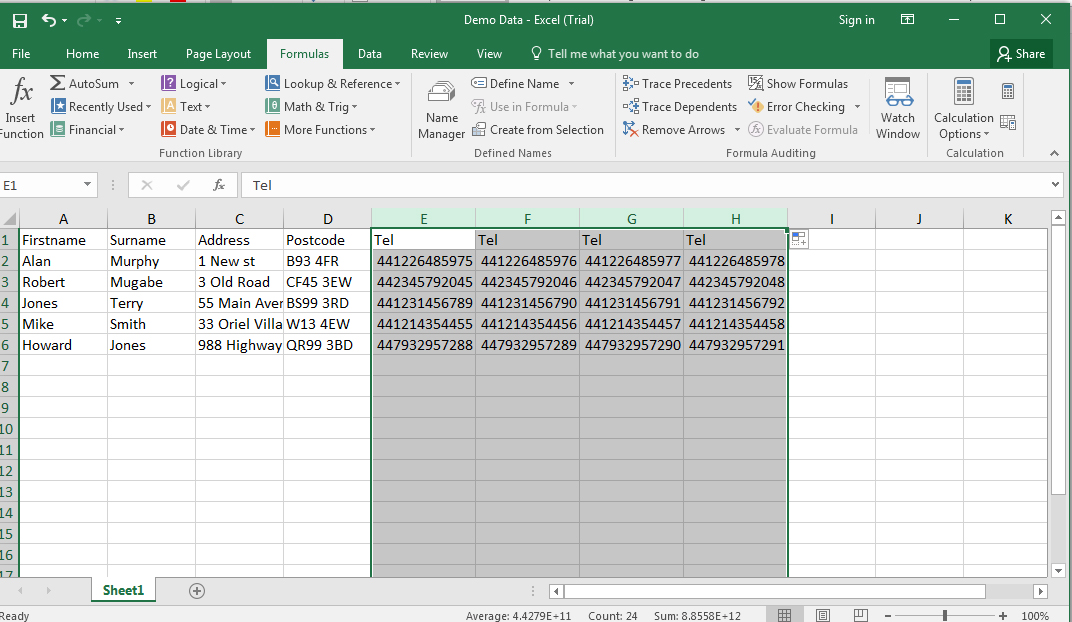
8: Then we highlight the first 3 columns and press delete on the keyboard and it will delete them and so we should end up with the result at the bottom where the numbers have been shifted.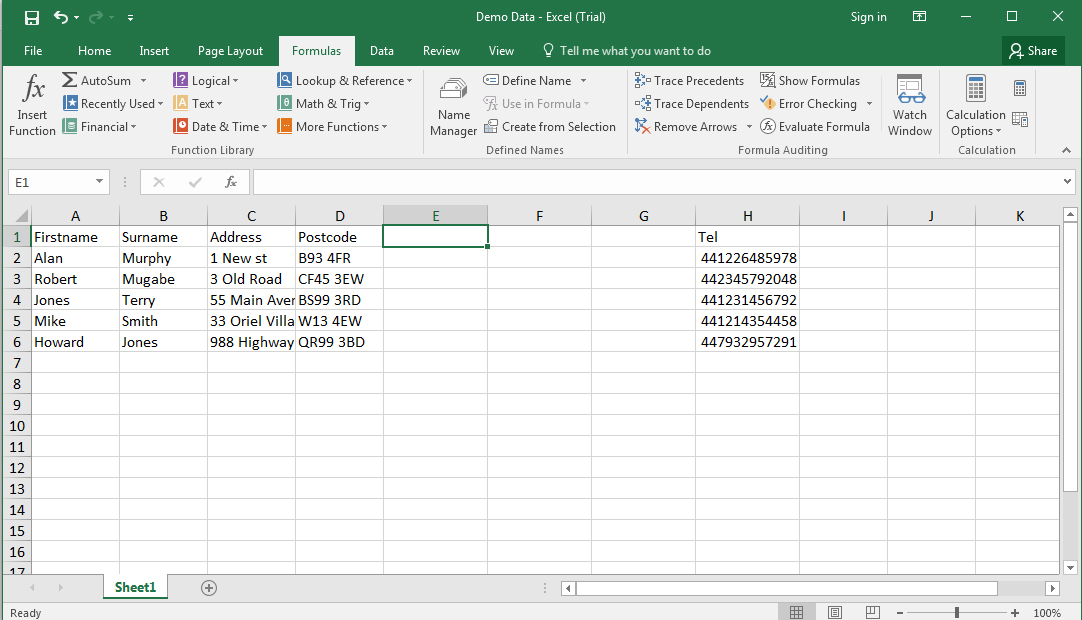
9: Now in the field below the one we are currently in we want to enter a formula that will remove the 44 prefix and will add the numbers so in the E2 field we want to enter the formula =RIGHT(H2,LEN(H2)-2), what this formula does is it retrieves the number from the cell H2 and it subtracts 2 number from the right to left which in this case removes the 44.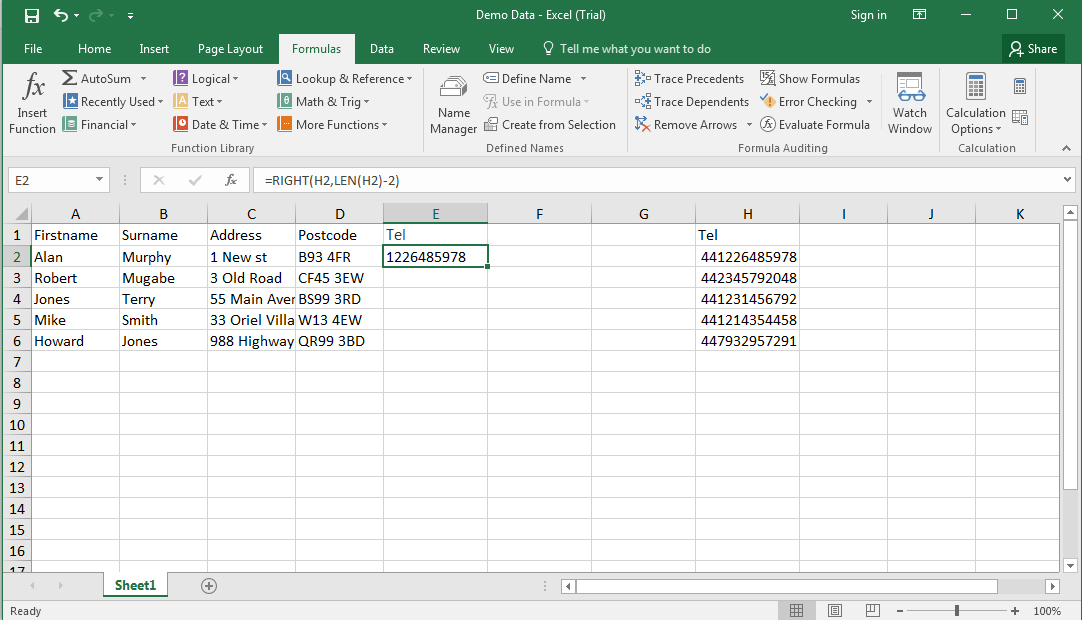
10: Then after this all we need to do is duplicate the formula for the rest of the numbers so from the bottom right of the cell where the dot is, we hover over it and then drag down to where our data ends so then as you can see from the end result our data is then duplicated with no 44 prefix.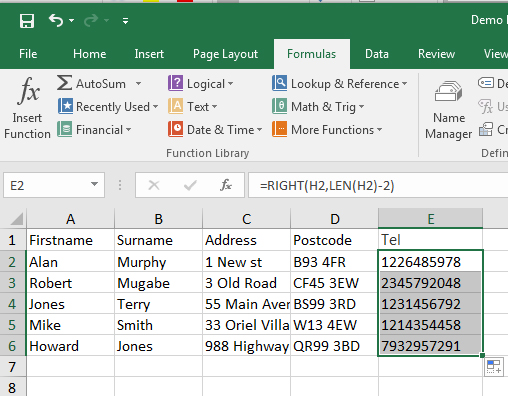
11: Finally, you will want to save it as a .xls file so we can have it ready for import. You can put the file anywhere you want as long as you remember its location.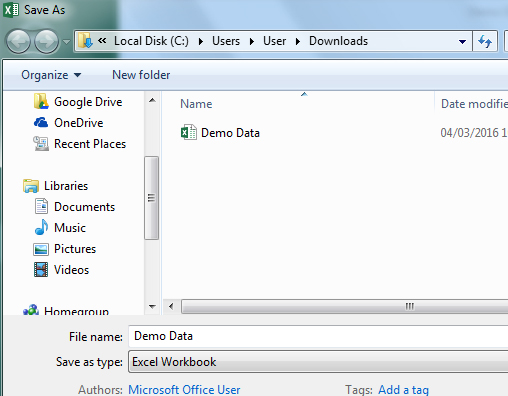
Creating a List
1: Firstly, what we want to do is open Google Chrome.
2: Then we want to go to the admin panel so we enter in the URL, the name of the company, followed by dialer360.com, then /adminpanel (https://companyname.dialer360.com/adminpanel).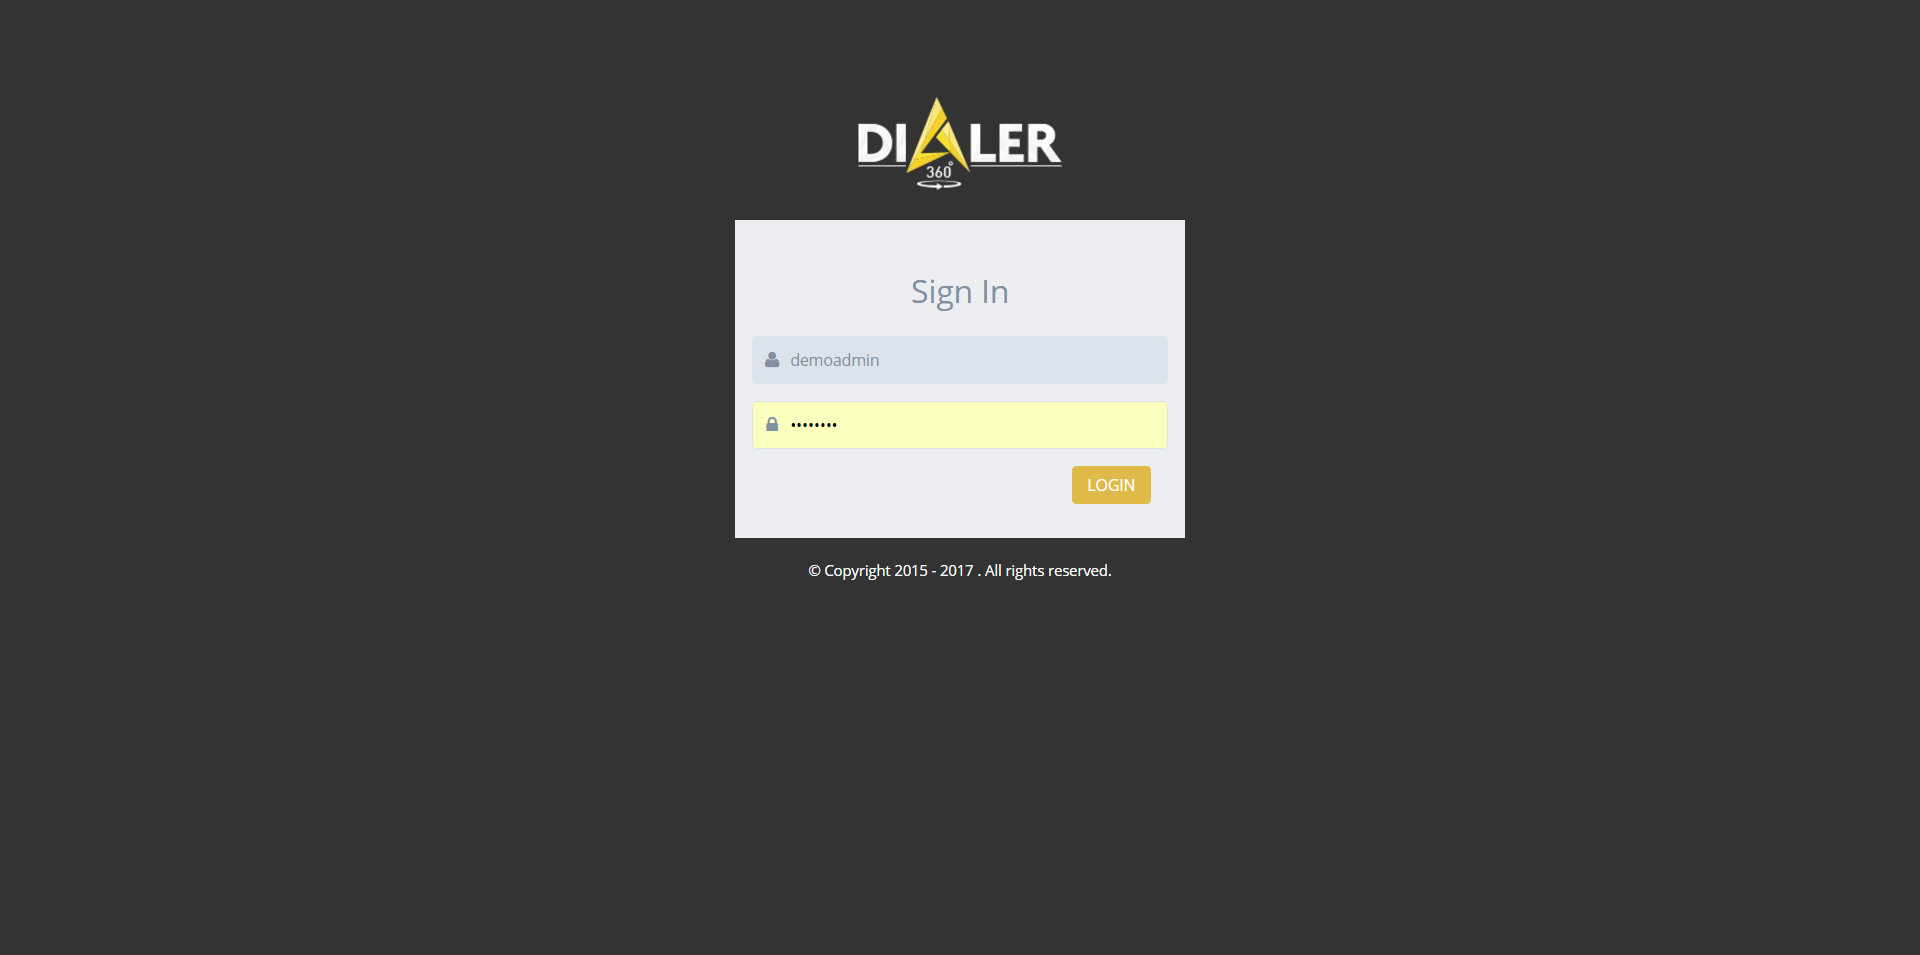
3: A screen will then load up asking you to login, you will want to login with admin details and then you will be redirected to the main dashboard which looks like the screen below.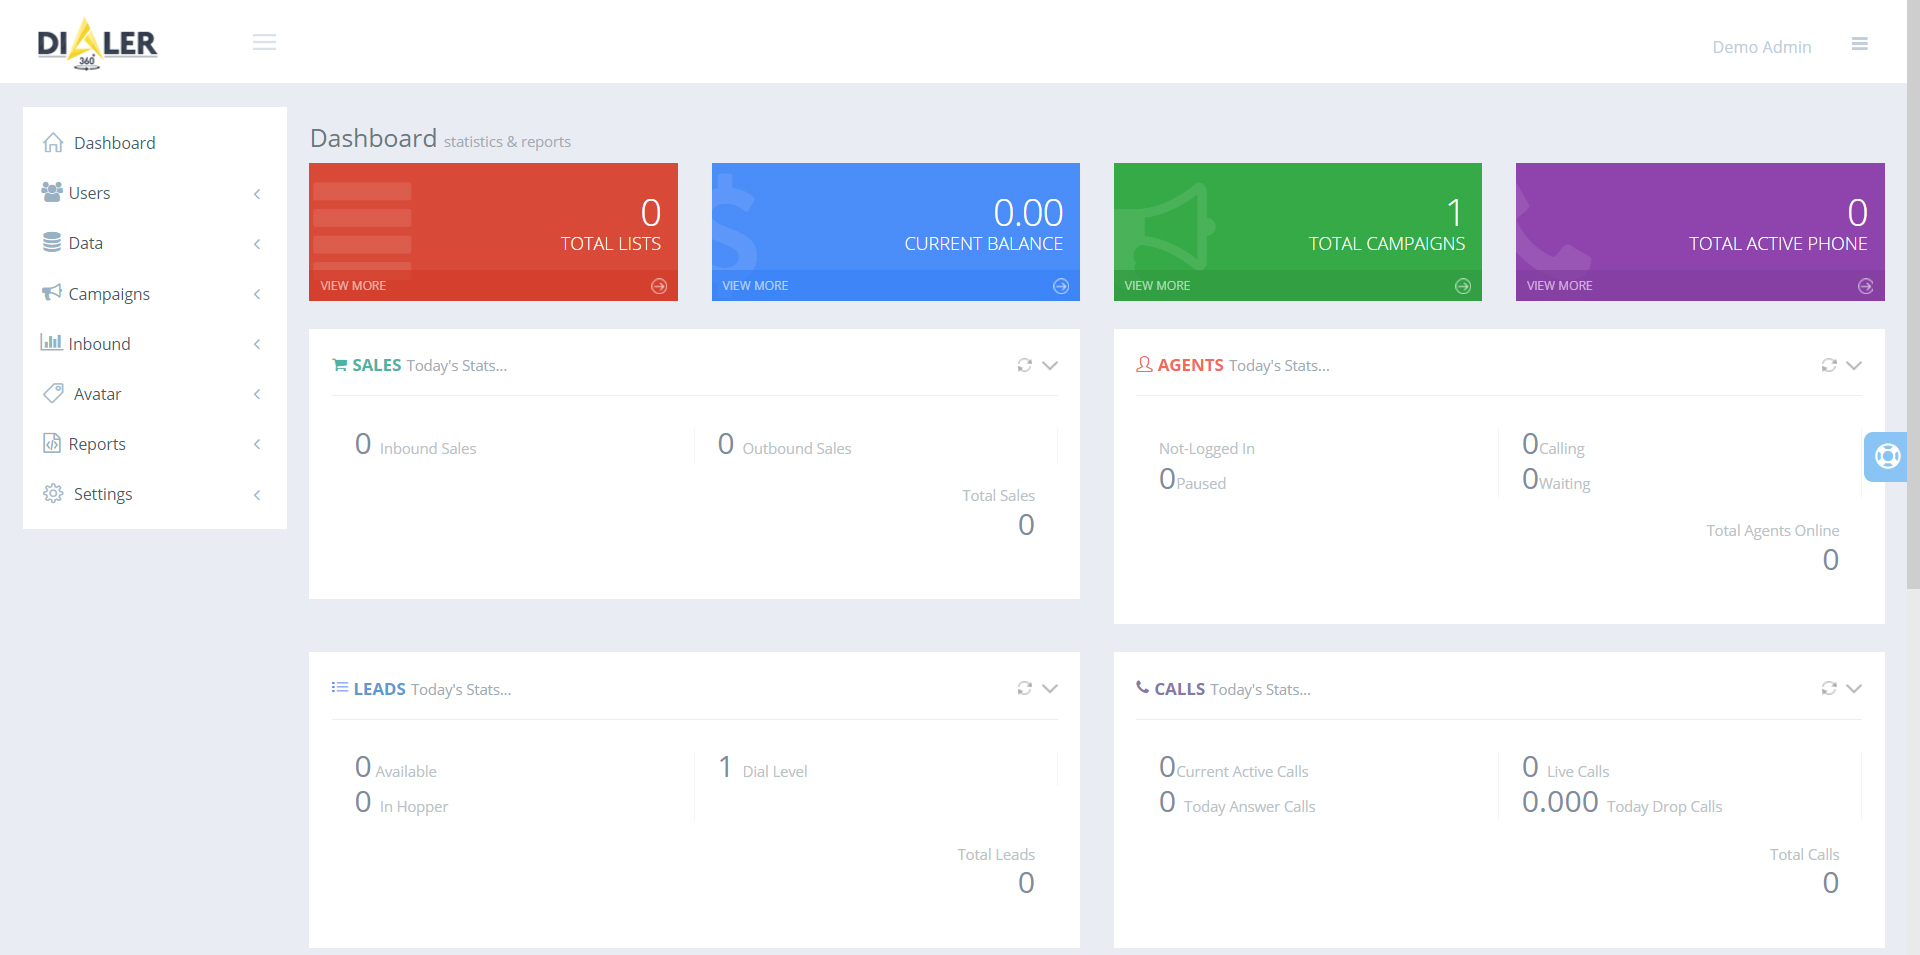
Everything is empty below as it is just a demo, different companies will have different numbers depending on the company.
4: You want to click on Data and then click on Lists.
5: Then when we come to this page we can begin to create the list, the List ID will always be in numbers (Writing the date would be recommended), followed by a name of your choosing. The description is not important, you want to set the list to active, you want to set it to the campaign you want and then click submit.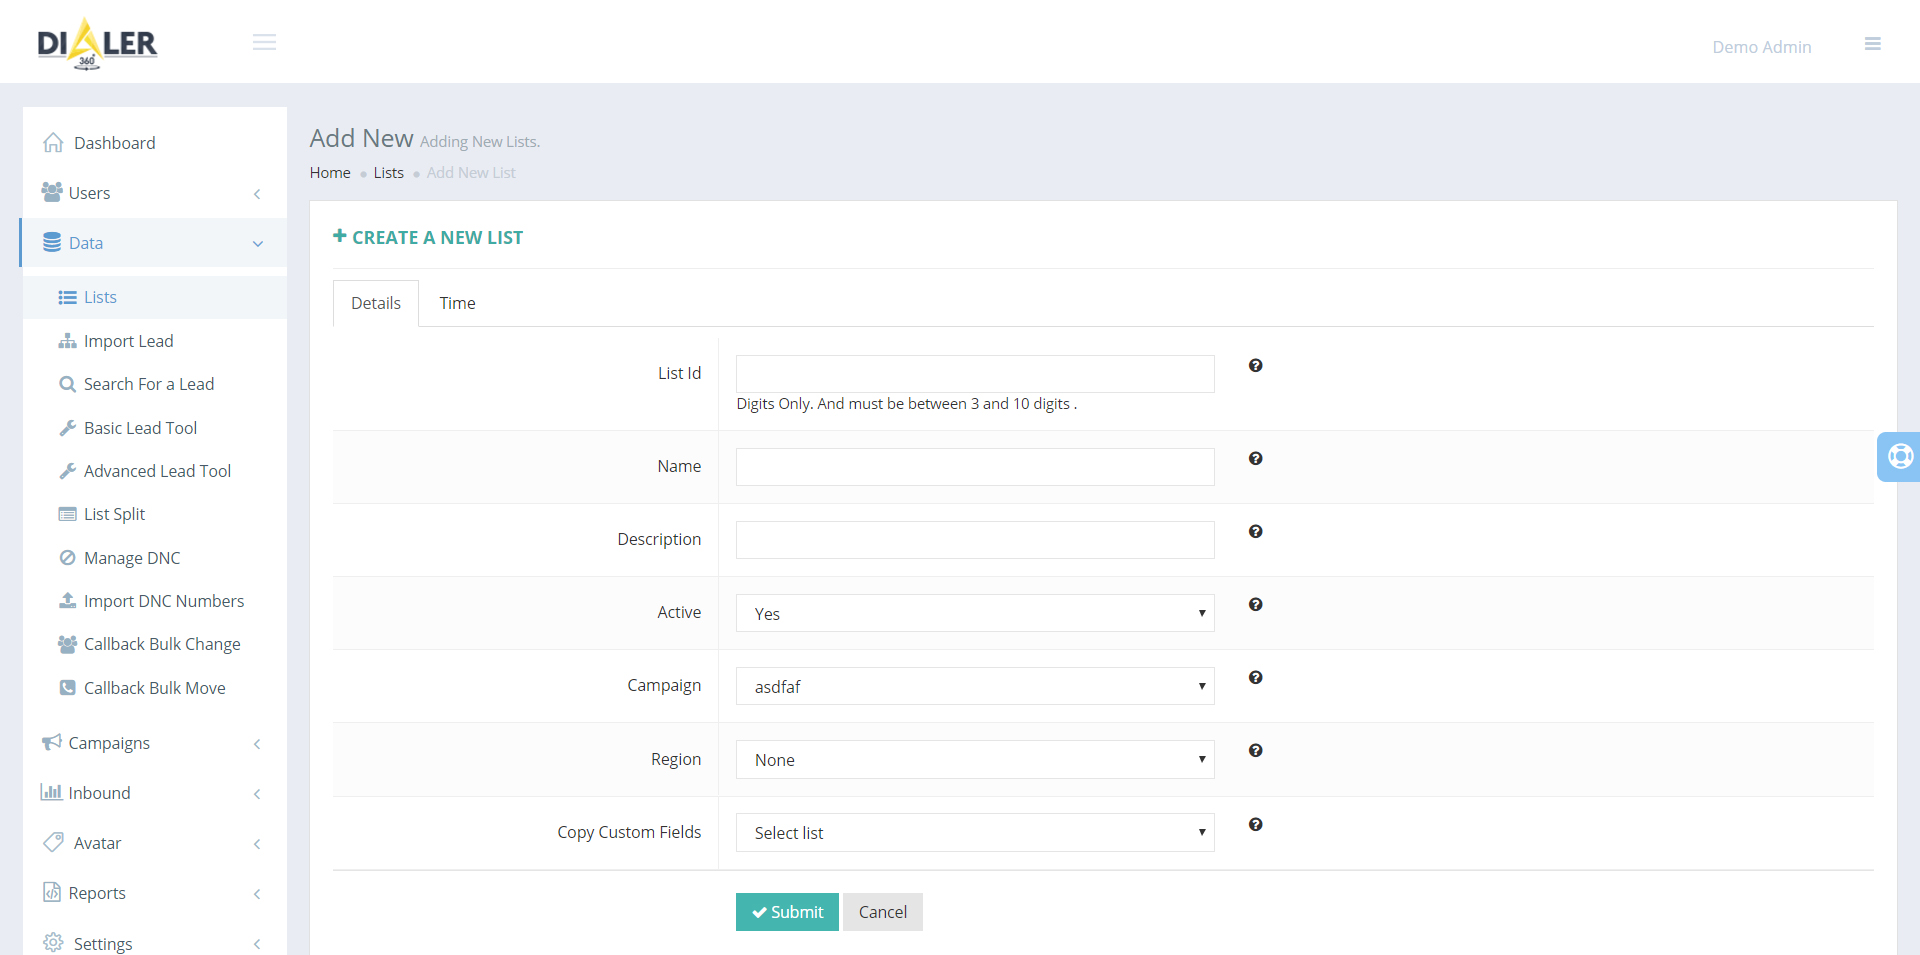
6: Then it will tell you that you have created a list successfully and now you are ready to import the leads (or upload the data).
Importing Leads
1: From the admin panel we want to click on Import Lead and a screen like this will come up.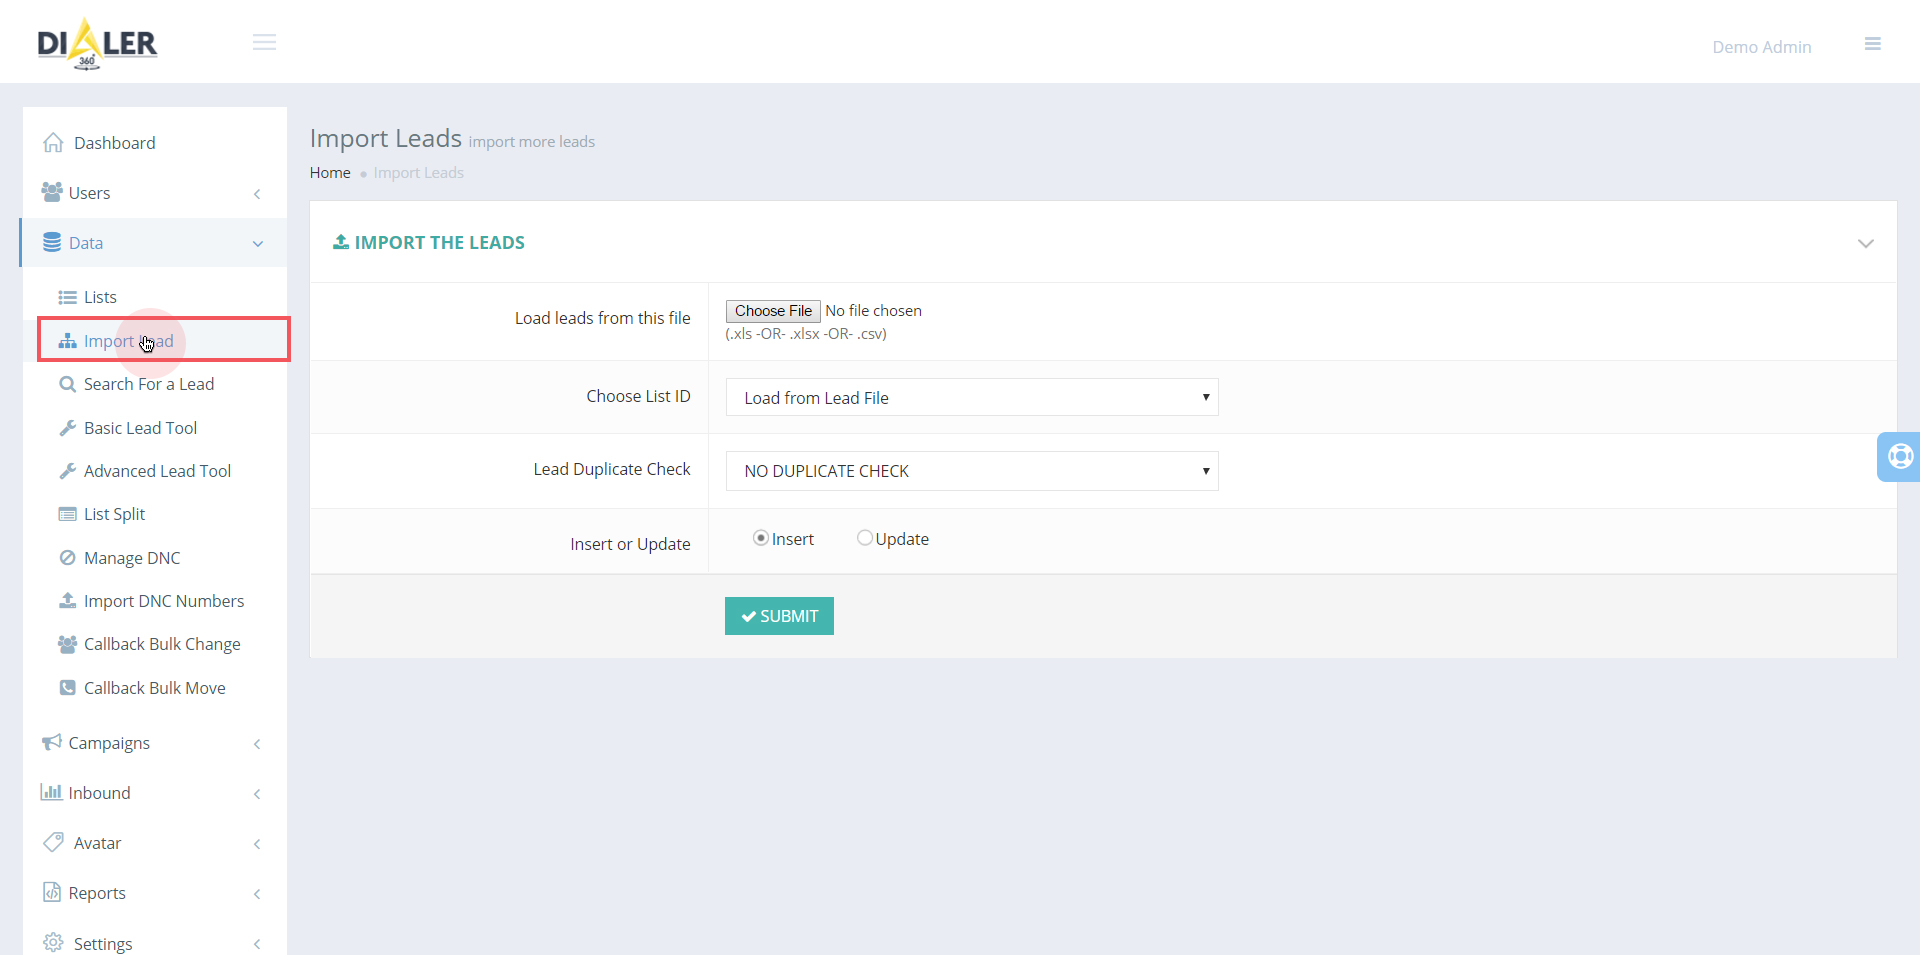
2: We then want to click our file that we prepped and saved as a .xls file and we want to okay that.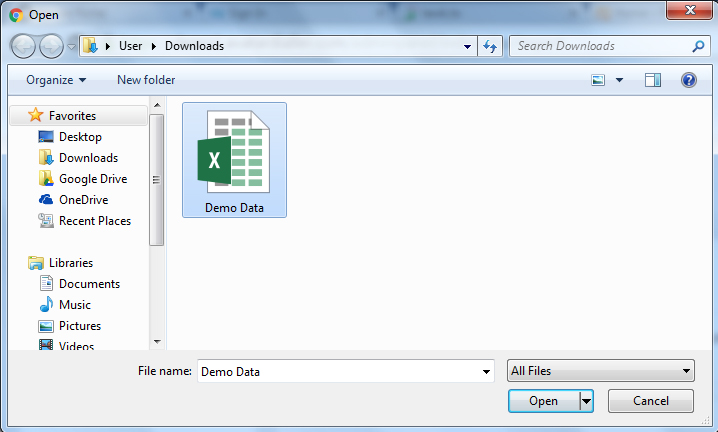
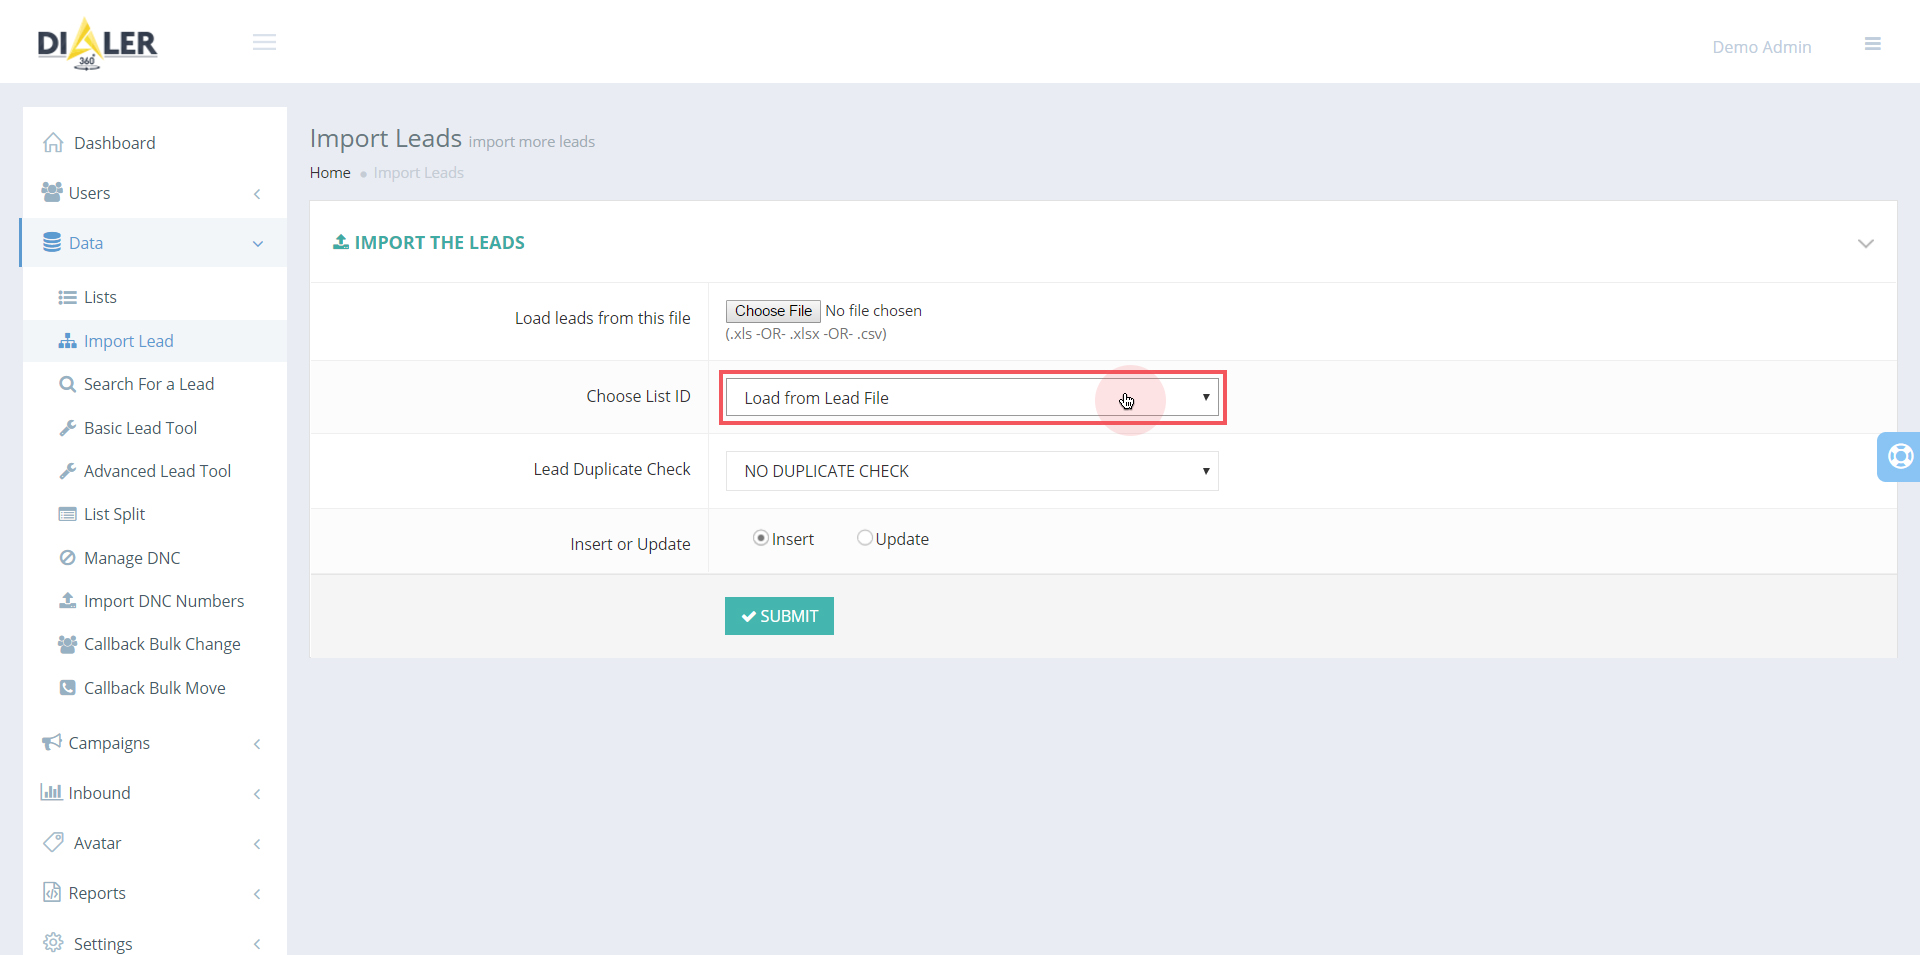
3: Once we’ve done that we need to select the list ID override and select which list the data will go on.
4: Lastly a duplicate check is optional, now I’ll show the options for this but we won’t be performing a duplication check but what it does is, it goes through the data to see if there are any double copies of data and it just gets rid of them.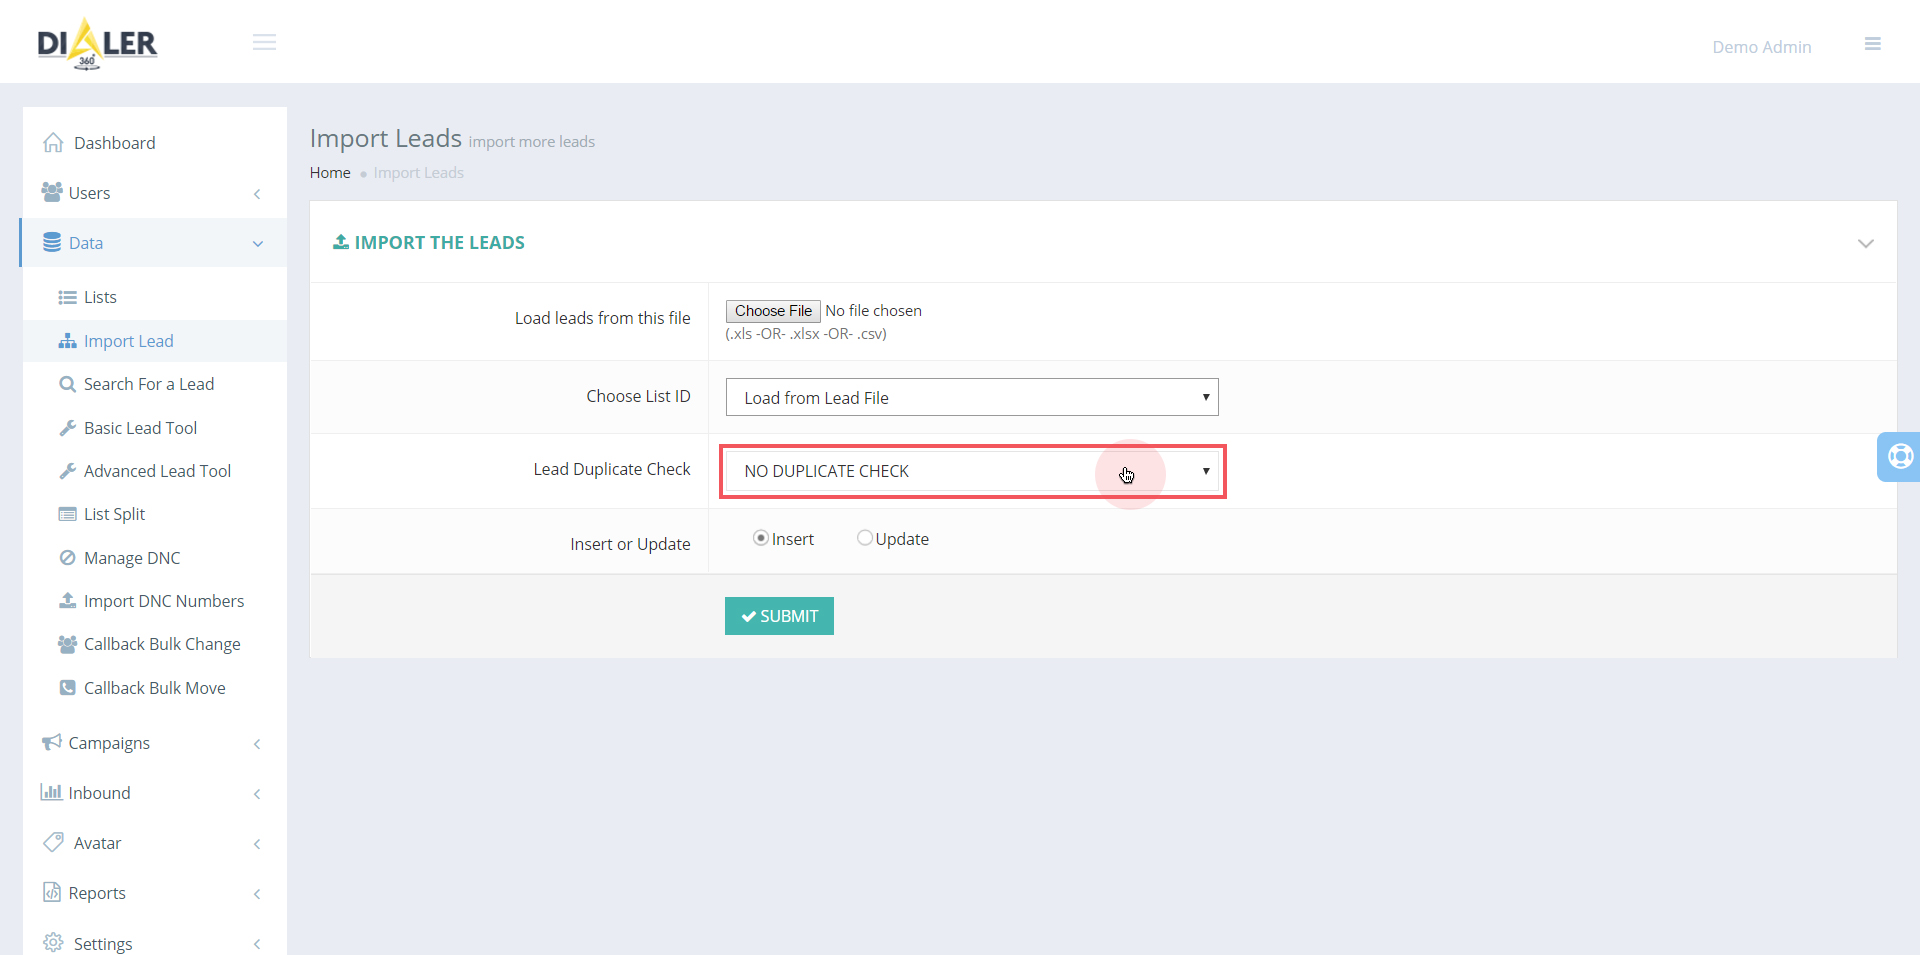
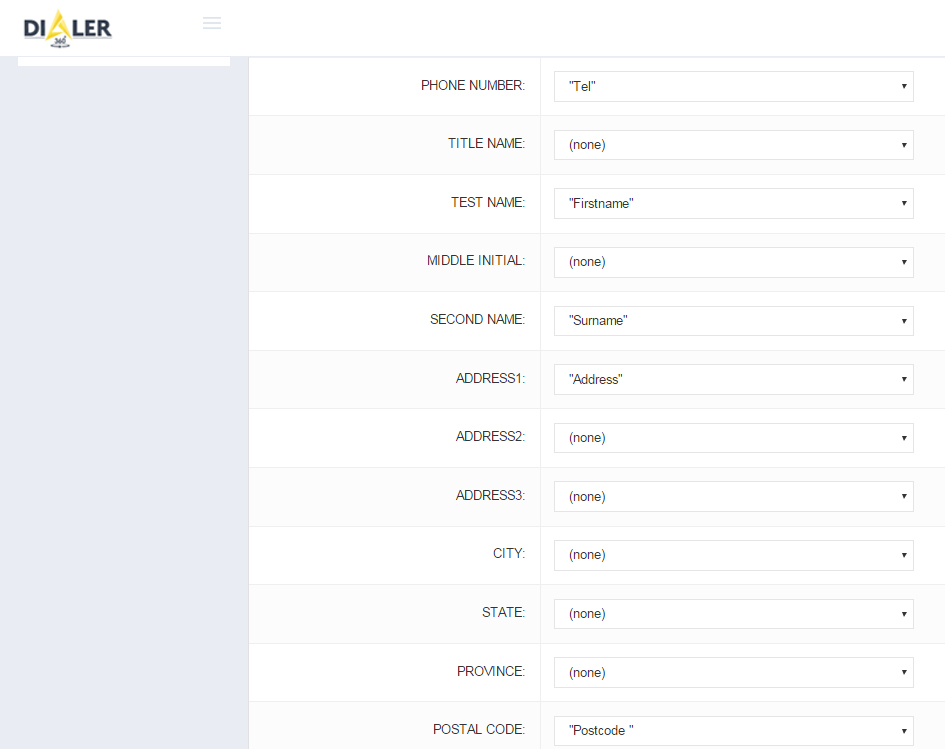
5: Now here we sort out the categories that we made in the Excel file and the correct category will go under the correct option.
You will not have all the categories so just select the ones that you have.
6: Then we just click “Ok to process” and we’re done, the leads are now imported and this is what will come up when it is done.![]()
